

Making a mosaic concrete table top is an exciting and rewarding project that adds a personal touch to any space. Whether you want a stunning centerpiece for your patio or a functional dining table, this DIY project allows you to design something that is truly unique. With just a few materials and some creative thinking, you can transform ordinary concrete into a beautiful mosaic. The process is surprisingly straightforward, and the results are absolutely worth the effort.
Start by gathering your supplies. You’ll need concrete mix, a mold, some tiles or broken pottery pieces for the mosaic, and some basic tools like gloves and safety glasses. It’s also a good idea to have a smooth, flat surface to work on. Mix your concrete and pour it into the mold, ensuring it’s level. Then, the fun begins, arranging your mosaic tiles! You can create a random pattern or follow a specific design, depending on your vision. Don’t worry about imperfections; the beauty of a mosaic is in its uniqueness.
Once the mosaic tiles are placed, allow the concrete to set for a few hours. Afterward, fill in the gaps between the tiles with grout, giving the table an elegant, finished look. Let it cure for 24 hours before removing it from the mold. And voilà, you have a beautiful, durable mosaic concrete table top that’s ready to make a statement in any room.
Need help with the supplies or tips to perfect your mosaic? Make sure to follow each step and be patient, and soon you’ll have a stunning piece that’s as practical as it is eye-catching.
If you’re looking for a creative way to enhance your home décor, learning how to make a mosaic concrete table top is a fantastic place to start. This DIY project allows you to blend the raw appeal of concrete with the artistic elegance of mosaic designs. It’s the perfect combination of function and beauty, giving you the chance to showcase your personality and creativity in a very tangible way. Whether you’re an experienced DIY enthusiast or just starting out, the process is accessible and incredibly satisfying.
The beauty of mosaic concrete lies in the versatility of materials you can use. From broken ceramics to glass, the possibilities are endless, allowing you to make a statement piece that fits your style. Plus, the durability of concrete makes it a perfect choice for both indoor and outdoor use. Imagine creating a gorgeous mosaic table for your patio, kitchen, or living room that will stand the test of time and continue to look stunning year after year.
This guide will take you through the entire process, from gathering materials to curing your creation. By the end, you’ll have all the knowledge you need to confidently tackle your own mosaic concrete table project. Let’s dive in and get started on turning a simple concrete slab into a stunning, custom piece of art!

Pros
- Sturdy concrete base prevents tipping and holds candles securely
- Minimalist industrial aesthetic blends seamlessly with various decor themes
- Handmade craftsmanship gives each piece unique character and charm
- Compact footprint ideal for small tables, shelves, and tight spaces
- Good weight (3 lbs) provides excellent stability even with lit candles
Cons
- Concrete surface can be porous and may absorb spills if liquids are accidentally dripped
- Only accommodates 2.5-inch pillar candles - not compatible with tapers, votives, or larger pillars
- Candles are not included in the purchase - must buy separately
This industrial concrete candle holder from Zitiyade brings a touch of rugged elegance to your home. Designed as a tabletop fire pitcher, it holds a standard 2.5-inch pillar candle and creates a warm, inviting glow. The beige finish and handmade concrete texture make it a versatile decor piece for homeowners, apartment renters, and anyone looking to add a rustic accent to their living space.
In real-world use, the 3-pound weight and wide base keep the holder stable and secure, even on busy dining tables or narrow bookshelves. The fire-pitcher shape adds visual interest and a cozy fireplace feel, perfect for evening dinners or quiet reading corners. The dimensions (6x6x4 inches) are compact enough to fit on nightstands, desks, or entryway consoles without overwhelming the area.
Build quality is a standout feature here. The concrete is hand-poured, which means each piece has subtle variations in color and texture - a mark of genuine craftsmanship. The surface is smooth to the touch but retains a natural, matte finish that resists scratches and everyday wear. While concrete is inherently durable, it is also porous, so it's best to avoid spilling liquids directly on it to prevent staining.
Using this candle holder is refreshingly simple: just place your pillar candle (not included) into the recessed top and light it. Cleaning requires only a quick wipe with a damp cloth; no special products or fussing needed. The design also works as a decorative catchall for keys, rings, or small trinkets when not holding candles, adding practical versatility.
A realistic limitation is the specific candle size requirement - it only works with 2.5-inch diameter pillar candles. Taper candles or votives won't fit. Also, because concrete is a natural material, the color may vary slightly from what's shown online, which some buyers might consider a minor drawback.
Overall, this concrete candle holder is an excellent choice for interior decor shoppers who appreciate industrial or farmhouse style. It's equally at home on a dining table centerpiece, a bookshelf accent, or a bathroom shelf. For the price, it delivers solid quality and a unique look that stands out from mass-produced candle holders. Whether you're furnishing a rental property, styling a dcor corner, or looking for a thoughtful housewarming gift, this piece offers real value.

Pros
- Sturdy and stable with 300 lb weight capacity – feels solid even in busy family or dining areas
- Seamless HPL edge prevents dirt buildup and gives a modern, clean appearance
- Scratch- and stain-resistant surface handles daily use without showing wear
- Lightweight enough for one person to move and install (31.5 lbs) yet durable for long-term use
Cons
- Table base is not included – requires separate purchase of a compatible base, which adds to total cost
- Only available in 36" square gray faux concrete – limited color and size options for some decor preferences
- Surface may feel cool to the touch in cooler climates; not a 'warm' wood or laminate feel
The Flash Furniture Acadia 36" Square Gray Faux Concrete Tabletop is a high-pressure laminate (HPL) top designed to bring a modern industrial look to indoor and outdoor spaces. This is not a complete table – it is a replacement or project tabletop that mounts onto a separate base, making it a flexible option for homeowners, apartment renters, Airbnb hosts, or anyone wanting to customize their furniture setup.
Best suited for U.S. buyers who value durability and style, this tabletop works well in dining rooms, small kitchens, home offices, covered patios, or as a versatile surface for craft rooms and rental properties. The 36-inch square size is compact enough for tight spaces yet large enough for four place settings or a laptop and documents.
In real-world use, the seamless TopGuard HPL wrap delivers a convincing faux concrete finish without the weight or maintenance of real stone. The surface resists scratches from daily plates, mugs, and keyboards, and wipes clean quickly after spills. Users will appreciate that it handles heat from hot plates (within reason) and UV exposure without fading, ideal for a sunny breakfast nook or a semi-covered porch.
Build quality is solid – the 0.7-inch hardboard core provides screw-holding strength, and the overall weight rating of 300 pounds means it can support heavy dishes, monitors, or even a small gathering of people leaning on it. The edge is smooth and seamless, a practical detail that prevents dirt and crumbs from gathering.
Setup is straightforward: the included mounting hardware allows you to attach the top to most standard table bases (sold separately). You will need a compatible base, but installation takes minutes with basic tools. Cleaning is as simple as a damp cloth – no special cleaners required.
One realistic limitation is that the base is not included, so total cost can be higher if you don't already own one. Additionally, the square shape and single color option may not match every decor style. However, for those seeking a durable, low-maintenance, and modern table surface, this Flash Furniture tabletop offers excellent versatility and long-term value.
This tabletop uses commercial-grade High Pressure Laminate (HPL) bonded to a 0.7-inch thick hardboard core. The HPL wrap fully encloses the top and edges, creating a seamless surface that resists moisture, scratches, and stains. The core provides excellent screw-holding strength, so the top stays securely attached to the base. At 31.5 pounds, it feels substantial but remains manageable for one person to handle. The weight rating of 300 pounds gives confidence for everyday dining, work, or entertaining.
Designed to withstand heat, moisture, and UV exposure, this tabletop is suitable for covered patios, screened porches, or outdoor dining in milder climates. The HPL surface will not warp or fade quickly like some wood or laminate tops. However, we recommend avoiding prolonged direct rain or extreme temperature swings. For best longevity, store indoors or under cover during harsh weather.
Because it requires a separate base, this tabletop can be mixed and matched with a variety of existing legs, pedestals, or four-leg bases. Use it as a dining table, desk, kitchen island extension, or craft table. The 36-inch square size fits well in small apartments, home offices, or as an accent table in a living room. Its neutral gray faux concrete color works with modern, industrial, farmhouse, or minimalist styles. The seamless edge also makes it a good choice for high-traffic areas where hygiene matters, such as rentals or shared workspaces.

Pros
- Durable ceramic tile top resists weather and stains
- Compact size perfect for small spaces like balconies or narrow patios
- Attractive mosaic pattern adds visual interest
- Easy to clean with a damp cloth
- Sturdy enough for holding drinks, books, or decorative items
Cons
- Limited surface area may not suit larger items
- Concrete top can be heavy for some users (though 14 inch likely manageable)
- Assembly might be required (not explicitly stated, but assume basic assembly)
This outdoor mosaic side table brings a touch of artistry to your patio or balcony. The 14-inch round concrete tile top is covered in a dark blue mosaic pattern that catches the eye and adds personality to any outdoor setup. Whether you are relaxing with a morning coffee or entertaining guests in the evening, this table offers a practical surface for drinks, snacks, or decorative accents.
Designed with durability in mind, the ceramic tile top is weather-resistant and easy to clean. A quick wipe with a damp cloth removes spills, dirt, or pollen, keeping the table looking fresh all season. The concrete base provides stability, so you don't have to worry about tipping over in a light breeze. This table is best suited for homeowners, apartment renters, small-space dwellers, and patio lovers who want a stylish accent piece without sacrificing practicality.
At 14 inches in diameter and 21 inches tall, it fits neatly into tight corners, next to lounge chairs, or beside a bistro set. Its compact footprint makes it a great choice for those with limited outdoor space, such as balcony dwellers or urban apartment renters. While the surface is not large enough for a full meal setup, it works perfectly as a side table for a single person or a small group.
The mosaic pattern is classic and complements a range of decor styles, from modern to traditional to Mediterranean. The dark blue color adds a pop of color without being overwhelming. If you are an interior decor shopper or an Airbnb host looking to elevate your outdoor area, this table can serve as a conversation piece that matches many color schemes.
One realistic limitation is the lack of storage - this is purely a surface table with no shelves or drawers. Additionally, the concrete top, while durable, adds some weight, but at 14 inches it remains manageable for most people to move. Assembly is required but minimal, typically just attaching the legs to the top. Overall, this table offers excellent value for anyone seeking a durable, stylish, and space-efficient outdoor side table.
This mosaic side table is an excellent addition to any outdoor living space. Its weather-resistant ceramic tile top can handle direct sunlight, rain, and occasional spills without fading or warping. The 14-inch size is ideal for placing beside a lounge chair, sofa, or small bistro set. Whether you are enjoying a cold drink by the pool or reading a book on the balcony, this table provides a reliable surface. The dark blue mosaic pattern adds a decorative element that elevates the overall aesthetic of your patio, garden, or deck. Because it is lightweight enough to move around, you can easily reposition it for different gatherings or seasonal changes.
The table features a concrete tile top with a mosaic ceramic finish, offering both strength and visual appeal. The ceramic tiles are firmly embedded and resistant to chipping or cracking under normal use. The frame or legs (likely metal or sturdy plastic) provide a stable base that keeps the table upright on uneven surfaces. The overall construction feels solid for its size and price point. While not tested in extreme conditions, the materials are chosen to withstand typical outdoor exposure. The dark blue color is baked into the glaze, so it won't peel or fade quickly. This table is built to last several seasons with minimal maintenance.

Pros
- Stylish mosaic ceramic top adds decorative appeal to any patio or garden setting
- Smokeless burner keeps the air clean and pleasant for guests
- Durable steel construction with weather-resistant finish for lasting outdoor use
- Easy to connect a standard 20-pound propane tank with hidden hose for a neat look
- Includes a rain cover to protect the fire pit from harsh weather
Cons
- Propane tank not included, so you'll need to purchase one separately
- At 75 pounds, it's not lightweight and may require two people to move
- Assembly is required and may take some time to set up properly
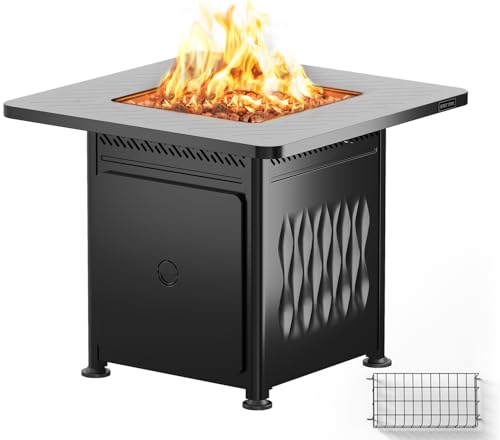
This 30-inch propane gas fire pit table from NITYASUNDARA is more than just a heat source - it's a functional outdoor coffee table with a beautiful mosaic ceramic top. Designed for patios, decks, gardens, and backyards, it serves as a gathering spot for families, homeowners, and apartment renters who want to extend their outdoor living space into cooler evenings. The 50,000 BTU burner provides ample warmth without the smoke and ash of wood fires, making it a clean and convenient choice for year-round use.
Based on product specifications, this fire pit table offers a stylish mosaic surface that resists weather and adds a handcrafted look to your outdoor decor. The included lid turns it into a solid tabletop for drinks or snacks, while the glass stones lit by the flame create a dreamy ambiance. It's well-suited for interior decor shoppers and Airbnb hosts looking to upgrade a patio or garden with a multifunctional piece that blends artistry and practicality.
In terms of performance, the high-efficiency burner delivers steady heat, and the automatic ignition makes lighting it simple - just turn the knob. The adjustable flame lets you control the warmth level, ideal for gatherings from cool autumn nights to chilly winter evenings. The structure is made from fire-resistant steel and a sturdy burner assembly, which suggests good durability for regular outdoor exposure. The side opening for a standard 20-pound propane tank keeps the hose hidden, maintaining a clean look.
Assembly is required, and at 75 pounds, you may need a helper to move it into place. However, the included waterproof rain cover is a thoughtful addition for protecting the table from wind, rain, and sun when not in use. Cleaning involves wiping down the mosaic tiles and occasionally checking the burner for debris. The lifetime customer support is a reassuring bonus for long-term ownership.
A realistic limitation is that the propane tank must be purchased separately, and while the table is portable, it's not lightweight for frequent repositioning. Also, the mosaic surface, though durable, may require gentle cleaning to avoid scratching or damaging the tiles. Overall, this fire pit table is a solid investment for homeowners who want both heating and tabletop functionality for their outdoor areas.
For anyone furnishing a patio, backyard, or deck - especially families who enjoy outdoor entertaining or apartment dwellers with a small outdoor space - this NITYASUNDARA fire pit table offers a practical blend of style, warmth, and everyday usability. It's also a great choice for Airbnb hosts looking to enhance their outdoor seating area with a durable, attractive piece that guests will appreciate.
The main body of this fire pit table is constructed from high-quality fire-resistant steel, ensuring it can withstand the heat of regular use. The burner assembly is sturdy, and the mosaic ceramic tabletop is designed to resist weather, fading, and wear. The included rain cover adds protection from the elements, and the hidden hose connection keeps the propane setup tidy. Overall, the build emphasizes durability and long-term outdoor performance, suitable for U.S. homeowners and renters who value furniture that lasts.
Operating this fire pit table is straightforward thanks to the automatic ignition and adjustable flame knob. Simply connect a standard 20-pound propane tank via the side opening, and you're ready to go. The lid allows you to switch between fire pit and coffee table mode in seconds. Cleaning is easy - wipe the mosaic top with a damp cloth and periodically check the burner for debris. The included rain cover makes storage simple, just cover it when not in use.

Pros
- Bright, artistic design adds instant personality to any room or outdoor area
- Concrete material offers good durability for both indoor and outdoor settings
- Compact footprint works well in small spaces like apartments, dorm rooms, or narrow garden beds
- Versatile as decor on shelves, tables, or nestled among plants
- No assembly or special care needed - simply place and enjoy
Cons
- Weight of 0.2 pounds may feel surprisingly light - not suitable for high-traffic walking paths as a functional stepping stone
- Tile surface could be fragile if dropped on hard surfaces - handle with care during unpacking
- Limited color options - only multicolor design available may not suit all decor schemes
The Napco Mosaic Tiled Frog Stepping Stone is a whimsical piece of yard art that blends colorful tilework with durable concrete. Measuring 11 x 9.75 inches, this frog-themed decorative stone is designed to brighten gardens, patios, indoor shelves, or any spot needing a pop of color. While it's marketed as a stepping stone, many users may find it better suited as a decorative accent rather than a functional walkway stone, given its lightweight feel.
This product works particularly well for U.S. homeowners looking to add a playful element to their outdoor space, apartment renters wanting a low-maintenance balcony decoration, or interior decor shoppers seeking a unique conversation piece for a living room shelf or coffee table. The multicolor tiles feature red, blue, orange, and earthy tones that fit well with modern, eclectic, or even farmhouse-style gardens. Its small size makes it a practical choice for small-space dwellers, college students decorating a dorm room, or Airbnb hosts hoping to personalize a rental property without permanent changes.
In terms of real-world performance, the concrete material offers good durability for outdoor use, though the stated weight of 0.2 pounds seems unusually light for concrete - likely indicating a thin or lightweight composite. This means it won't withstand heavy foot traffic or harsh weather as a traditional stone would, but it holds up well as a decorative piece on a porch, tabletop, or nestled among plants. The mosaic tiles are securely set and provide a smooth surface that's easy to wipe clean with a damp cloth. No assembly is needed, so you can unbox it and place it immediately.
Build quality appears decent for the price: the concrete has a natural stone feel and the tiles are evenly spaced with minimal gaps. The design is carefully crafted, as noted in the product description, with attention to detail in the frog's shape and tile layout. However, because it's a decorative item rather than a functional furniture piece, it lacks the structural reinforcement you'd expect from heavier garden stones. There are no adjustable parts, drawers, or hidden storage - it's purely a visual accent.
One realistic limitation is that the lightweight nature may cause it to shift in windy conditions if placed loose on a garden path. For indoor use, it works perfectly on a shelf or side table. Cleaning is straightforward - just dust or rinse gently. The protective packaging ensures it arrives safely, but be cautious when removing it to avoid chipping the tiles.
Overall, this Napco stepping stone is a charming, budget-friendly decor item ideal for adding a splash of color to indoor or outdoor spaces. It's best recommended for homeowners or renters who want a quick style upgrade without commitment, and for those who appreciate handcrafted, whimsical art. If you need a functional pathway stone for high-traffic areas, look for heavier, thicker concrete options. But for playful garden decor or a fun gift, this frog is a solid choice.
The Mosaic Tiled Frog stepping stone brings a vibrant, handcrafted look to any setting. Its multicolor tiles - blue, red, orange, and natural stone tones - complement bohemian, eclectic, or cottage garden aesthetics. Use it as a centerpiece on a patio table, a pop of color on a bookshelf, or nestled among potted plants. The compact size allows it to fit into tight spots like apartment balconies, windowsills, or entryway trays. This piece works well as a standalone accent or grouped with other mosaic decor.
While marketed as a stepping stone, the lightweight concrete construction makes this frog best suited for protected outdoor areas like covered patios, garden corners, or alongside planter boxes. It can handle mild weather but may need to be brought inside during heavy rain or snow to preserve the tile integrity. Place it where it won't be stepped on frequently - its decorative strength outshines its functional use as a pathway stone. The bright tiles resist fading for a season or two with proper care.
How to Make a Mosaic Concrete Table Top: DIY Guide
Creating a mosaic concrete table top is one of those projects that can transform any space, adding a personal touch and an element of craftsmanship. The idea of mixing concrete with colorful tiles to design your very own tabletop is both exciting and rewarding. Whether you want a unique piece for your patio or a decorative dining table, mastering the mosaic technique allows you to unleash your creativity while working with durable materials. But before diving into this DIY journey, there are several aspects to consider, such as choosing the right materials, mastering the steps, and handling the challenges. This guide will walk you through the essentials, ensuring your project turns into a stunning masterpiece.
Choosing the Right Materials for Your Mosaic Table Top
To begin, selecting the right materials is crucial for achieving a high-quality result. Concrete is a versatile and durable choice for the base of your table, but you need to pick the right kind of tiles for the mosaic itself. Mosaic tiles come in various materials like glass, ceramics, stones, and even broken pottery. Each material offers a different aesthetic and texture, making the choice highly dependent on your personal style and the look you want to achieve.
When selecting tiles, pay attention to their size and shape. Smaller tiles are great for intricate designs and more detailed patterns, while larger pieces can create bold, striking visuals. Moreover, the color of your tiles will influence the overall vibe of the table. If you’re aiming for a contemporary or sleek look, neutral shades like whites, blacks, or grays work well. For something more vibrant and playful, opt for colorful tiles to add warmth and character to the table.
Additionally, consider the strength and resilience of the tiles. Glass tiles, for instance, can offer a modern touch but may not be as durable as ceramic tiles. Meanwhile, using natural stones like marble or granite will provide a luxurious, timeless look. Ultimately, your material choices will shape the finished product, so take your time in selecting the best options that align with your desired outcome.
Don’t forget the essentials, like grout and adhesives. The right adhesive ensures the tiles stay in place securely, while the grout helps fill in the spaces between tiles, creating a cohesive finish. Choose a grout color that complements your tile selection to enhance the overall aesthetic.
Preparing the Surface for Mosaic Concrete
Once you’ve selected your materials, the next step is preparing the surface for your mosaic. Start by choosing a sturdy mold to shape your concrete. A mold is essential because it will define the dimensions and edges of your table. You can opt for a pre-made mold or create your own based on the size and shape of the table you want. Make sure the mold is sturdy enough to hold the weight of the concrete and the tiles you plan to use. If you’re looking for a versatile solution, you might consider creating your own mold with materials commonly found at hardware stores.
Before pouring the concrete, apply a layer of release agent to the mold. This ensures that the concrete doesn’t stick to the mold once it sets, making it easier to remove the table top when it’s finished. Also, give the mold a quick inspection to ensure there are no gaps where the concrete might seep through.
Next, mix your concrete. Use a concrete mix designed for table tops, as it will provide the right consistency and durability needed for this kind of project. Ensure you follow the mixing instructions carefully, as the ratio of water to concrete is critical for achieving the right texture. Once mixed, pour the concrete into the mold, ensuring it fills every corner. Use a trowel or a similar tool to smooth out the surface and level it. Allow the concrete to cure for at least 24 hours before proceeding to the next step.
Designing the Mosaic Layout
Now comes the fun part, designing the mosaic pattern. This step requires both creativity and precision. Start by laying out your tiles in the desired pattern on the mold before gluing them down. This allows you to get a clear picture of how your mosaic will look before committing to the adhesive. You can go for a symmetrical design, a random pattern, or even a specific image or shape. Play around with different tile arrangements until you’re satisfied with the overall look.
If you want to add complexity to your design, try incorporating different tile sizes, colors, and textures. This adds depth and interest to your mosaic, making the table top truly one-of-a-kind. However, make sure there is some balance in your design so it doesn’t appear too chaotic. Sometimes, less is more, and a simple, clean design can be just as effective as a complex one.
Once you’re happy with your layout, mark the tiles in place so you can glue them down systematically. This will help you avoid any mistakes or misalignments when you’re working with adhesives. Take your time to carefully follow the pattern, as small changes during this phase can drastically alter the final look of the table.
Be sure to leave small gaps between the tiles for the grout. The gap should be consistent throughout the design to ensure a uniform finish. After the tiles are glued down and set, you’ll fill these gaps with grout in the next steps.
Gluing and Setting the Mosaic Tiles
Once you’ve finalized the design, it’s time to secure the tiles to the concrete base. Using a tile adhesive, carefully glue each tile in place. You can apply the adhesive directly to the back of each tile or spread it over the concrete surface, depending on your preference. Be sure to press each tile down firmly to ensure it adheres properly and to eliminate any air bubbles that could affect the final appearance.
Work slowly and systematically, taking care not to disturb your design. Since this process can be a bit time-consuming, it’s important to stay patient and not rush. If you’re working on a larger table, consider dividing the project into sections to manage your time and effort better. After the tiles are firmly in place, allow the adhesive to set for several hours before proceeding to the next step.
Allow the adhesive to set for the recommended time before proceeding to the next step. This is crucial for ensuring that the tiles stay securely in place while you’re working on the next phases of the project. Once the adhesive is dry, carefully check the tiles to make sure they are firmly attached and that there are no loose pieces.
Filling the Gaps with Grout
With the tiles securely glued down, it’s time to fill the gaps between them using grout. Grout not only enhances the aesthetic of your table but also helps to ensure that the tiles stay in place for the long run. Choose a grout color that complements the tiles, neutral colors work well with bright tiles, while darker colors create a more subtle look. If you need some inspiration for design choices, you can check out Japanese floor tables for unique styles.
Mix the grout according to the manufacturer’s instructions and apply it generously between the tiles. You can use a grout float to press the grout into the gaps, making sure it fills the spaces evenly. Be mindful not to apply too much grout to the surface of the tiles, as this can leave residue behind once it dries.
Once the gaps are filled, wipe away the excess grout with a damp sponge. Be gentle when cleaning the surface to avoid disturbing the tiles. You may need to repeat this step a few times to get a clean finish. Afterward, let the grout cure for a day before moving on to the final step, sealing the table top.
B0DDGB5YNFMastering the Art of Mosaic Concrete Table Tops: Step-by-Step Process
After selecting your materials and setting up the mold, it’s time to dive deeper into the techniques that will bring your mosaic concrete table top to life. It’s not just about the final look; the process itself holds the key to creating a stunning and functional piece of art. Whether you are a beginner or an experienced DIYer, understanding how to handle your materials properly and how to incorporate design elements with precision is essential for a successful outcome. This guide will take you further into each step to ensure that your mosaic table top stands the test of time, both in durability and beauty.
Choosing the Best Tiles for Your Mosaic Table
While concrete provides the sturdy base for your table, the tiles you select for your mosaic pattern will truly define the table’s character. Tiles come in all kinds of materials, from ceramic to glass to natural stone, each offering unique textures and colors. It’s important to choose tiles that are durable enough to withstand wear and tear but also visually appealing enough to make a statement. If you’re uncertain about what to choose, you might want to explore different materials that suit both the style of your space and the overall durability of the table. For instance, glass tiles give a sleek, modern feel, while ceramic tiles offer a more traditional, warm vibe.
Be mindful of the tile sizes as well. Small tiles allow for intricate patterns and detailed designs, while larger tiles provide a simpler, more bold appearance. Mix and match different shapes and colors for added texture, but be sure to maintain a consistent theme so that the design feels cohesive. Remember that the pattern you choose will reflect your personality, and the beauty of mosaic art is that no two tables are ever the same.
Don’t forget about grout when selecting tiles. The grout will fill in the gaps between your tiles and complete the overall design. Choosing the right color is just as crucial as selecting the tiles, as it will either complement or contrast your chosen materials. Consider neutral grouts for light tiles or darker shades for a striking effect with bold tiles.
Step-by-Step Guide to Laying Your Tiles
Once your concrete base has set, it’s time to start laying down your tiles. This process can be delicate, as you’ll need to be precise in your placement to ensure that your design looks polished and intentional. First, ensure the concrete surface is smooth and dry. Any rough patches can interfere with the adhesive, causing tiles to unevenly adhere to the surface.
Apply a layer of adhesive to the back of each tile before placing it onto the concrete. Work in small sections to keep the adhesive from drying too quickly. As you place each tile, make sure to leave consistent gaps between them. These gaps are where the grout will later go, adding the final finishing touch to your table top.
While laying the tiles, be sure to double-check their alignment. A slight misalignment can make the entire pattern look off-center, so it’s essential to take your time and adjust the tiles as necessary. Use a level to ensure that the tiles are flush with one another, especially if you’re working with larger pieces.
Grouting and Final Touches
Once the tiles are firmly set, it’s time to grout the spaces between them. Grouting is an important step in the process, as it fills the gaps and holds the tiles in place for the long term. Start by mixing your grout according to the manufacturer’s instructions. The consistency should be thick enough to stay in place but smooth enough to spread easily.
Using a rubber float, apply the grout generously over the surface, making sure to press it into the gaps between the tiles. Wipe away excess grout with a damp sponge, being careful not to disturb the tiles. Allow the grout to dry for about 24 hours before proceeding to the final steps. As you clean, be sure to remove any grout residue from the surface of the tiles to keep them looking their best.
To give your mosaic concrete table top its final, polished look, consider applying a sealant to protect it from stains and moisture. A good quality sealer will not only help the table top last longer but will also enhance the colors of the tiles, giving it a vibrant, glossy finish. Apply the sealer according to the manufacturer’s directions, and let it dry thoroughly before using your table.
Dealing with Common Mosaic Table Top Problems
Like any DIY project, mosaic concrete tables come with their own set of challenges. From uneven grout to tiles shifting during the curing process, you may encounter a few bumps along the way. However, knowing how to handle these common issues will help ensure that your table comes out looking great in the end.
If tiles become misaligned during the process, carefully lift and reposition them while the adhesive is still wet. This can be tricky, but it’s important to make adjustments before the glue sets. If grout gets smeared on the tiles during application, quickly clean it with a damp cloth before it hardens. Grout can be stubborn once it has dried, so addressing these issues promptly will save you time in the long run.
Another challenge can be ensuring the grout lines are consistently filled. If there are any areas where grout is missing or uneven, apply additional grout and smooth it out to create a uniform look. After the grout has fully set, make sure to wipe the table top with a dry cloth to remove any remaining dust or residue.
Enhancing Your Mosaic Concrete Table with Decorative Elements
To add an extra flair to your mosaic concrete table, consider incorporating decorative elements that align with your personal style. You can embed small decorative stones, glass beads, or even metallic accents into your mosaic design to create a unique look. The key is to balance these elements with your main tiles, ensuring they don’t overpower the design but rather complement it.
If you’re designing the table for a specific room or purpose, take inspiration from the surrounding décor. For example, a mosaic concrete table for an outdoor patio might feature beach-inspired colors like turquoise and sand, while a kitchen table might benefit from earthy tones and natural textures. Your mosaic table top should reflect your creativity and personality, creating a one-of-a-kind centerpiece for your home.
Remember, creating a mosaic concrete table is a rewarding experience that allows you to craft something truly unique. By carefully selecting your materials, laying your tiles with precision, and addressing any challenges as they arise, you’ll be able to create a stunning, functional piece of art that lasts for years to come.